 Sanskrit Name: – Uttanasana.
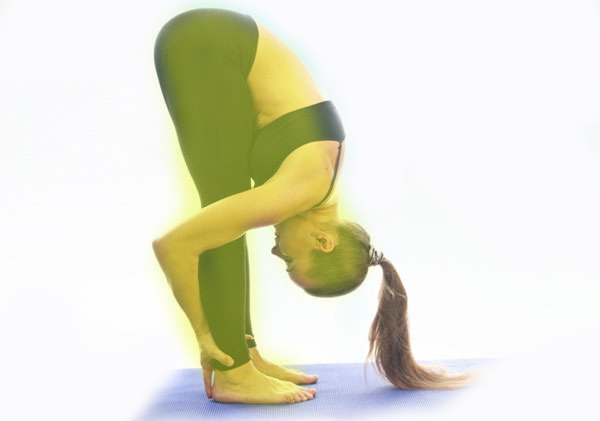
English Name: – Standing forward bend pose.
Position: – Standing and forward bend.
Uttanasana comes from the Sanskrit words Uttanasana and which is combination of ‘ut+tan+asana’ in this ‘ut’ means intense and ‘tan’ means stretch whereas ‘asana’ refers to Posture. Uttanasana or Standing Forward Bend pose is an important and simple stretching yoga pose that contains a variety of therapeutic advantages. In the Standing Forward Bend Yoga posture, your head hangs below the heart allowing fresh oxygen-rich blood to flow to your brain. This rejuvenates and revitalizes cells and provides the complete body a fast boost of oxygen. Although this can be often considered as a basic yoga pose, it’s vital that the right technique is followed to make sure that you simply stretch your hamstrings fully and don’t injure your back.
Navigator
Steps of Uttanasana: –
- Take a standing position; keep your feet and shoulder distance apart and parallel to each other.
- Press your feet down in to the ground and ground yourself powerfully.
- Now breathe out and gently bend down from the hips (not the waist) and place your chest and stomach on your thighs.
- If you are a beginner, you ought to bend your knees slightly to accomplish this.
- If your knees are bent, make sure that they’re straight over your toes.
- Slowly begin to straighten out your legs however check that your chest and abdomen never leave your thighs.
- Now elevate your hips as you straighten through your hamstring muscles all whereas pressing your heels into the ground.
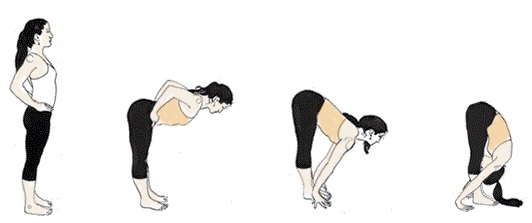
- Once you’re feeling stable, cross your forearms, grab your elbows and hang your head down.
- If you’re enough flexible, you’ll attempt to bring your palms to the ground or hold your heels from behind.
- Begin by holding this pose for thirty seconds and step by step work your way to one minute at a time.
- While holding this position, gently inhale and exhale.
- While breathe in, try to lift and lengthen your torso with each exhalation, try to go deeper and deeper into the stretch.
- There another way to increase the stretch is to roll on to the balls of your feet and lean slightly forward. This stretches the backs of your legs and permits you to carry the pose for extended.
- Don’t shut your eyes throughout this Asana.
- Try to hold this pose for 30 seconds.
- Release this pose by placing your hands back on to your hips and with a deep breath in (inhale), extend your back and come up to the initial position.
Benefits of Uttanasana
- It maintains the functions of liver, kidneys and spleen.
- Beneficial in flexibility of the hips.
- Gives Strengths to the knees and spine also.
- It improves the process of blood circulation.
- Helps to improves posture and alignment.
- Useful for stretching the leg muscles like calves and hamstrings.
- Improves the functions of endocrine and nervous system.
- Helps in cellular growth.
- Eases tension in the back, shoulder, and neck
- Useful for toning and activating the muscles of the abdomen.
Variations For Uttanasana: –
There are variety of variations that you just will attempt with this pose depending on your ability and flexibility. These are following:
- Hold on to the back of your ankles as you progress deeper in to the stretch.
- Grasp behind your heels and below your feet with all fingers inform forwards.
- Cross your arms behind your legs and reach to the front of your ankles with opposite hands.
- Cross your arms behind your legs and hold the other elbows.
You can additionally vary the create by partnering up with another person –
- As you apply the pose, place your buttocks against a wall for support.
- Your heels ought to be some inches far from the wall.
- Bend your knees and extend forwards and downward whereas your partner presses down on your sacrum.
- Slowly straighten your knees because the pressure continues.
- Hold this posture for thirty seconds to a moment and release it.
Note: –
Don’t try this Asana in case of back injury, do this pose with your knees bent.
You can conjointly attempt the Ardha Uttanasana rather than the Uttanasana if you suffer from chronic back pain. Avoid this Pose in case of injured legs, shoulders and hips. Avoid this Asana fully if you have got recently had back surgery, knee surgery or surgery to your hamstrings. Always concern a yoga expert before doing any Yogic activities.